Tech Tip: How to Setup Your Barcode Printer
Tech Tip: How to Setup Your Barcode Printer
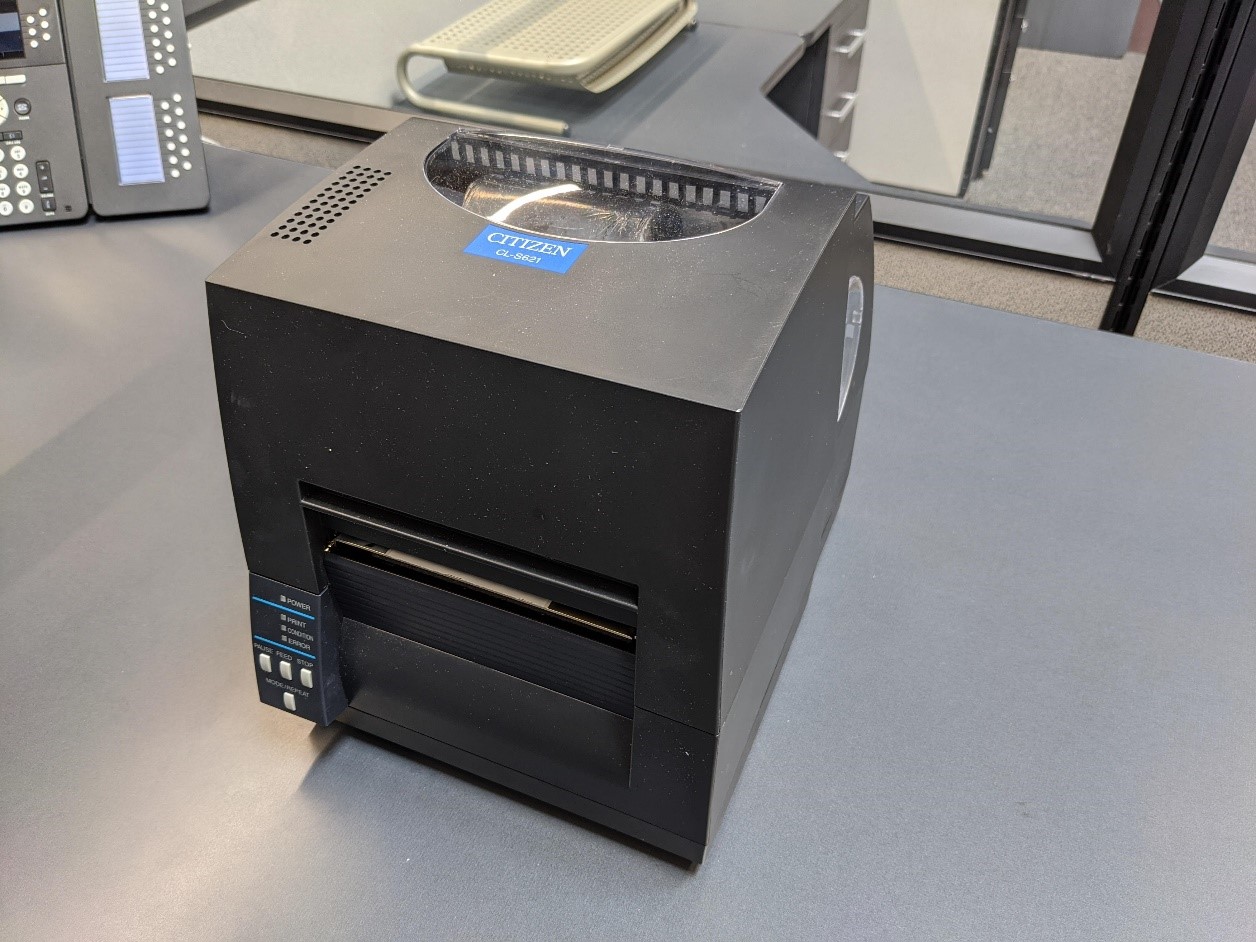
When you order a CL-S621 barcode printer from RTA Fleet Management Software, we will handle most of the setup before we send it out to you. However, you will need to align the sensor and install the labels and ink ribbon.
Use these tips from our Support team to learn how to complete these steps and to set up the label printer within the RTA software.
(Note: If a printer Network Card is needed for your operation, it can be purchased separately and either installed before shipping the printer or our Support team can walk you through the steps over the phone.)
Step 1: Adjust the Transparent Sensor
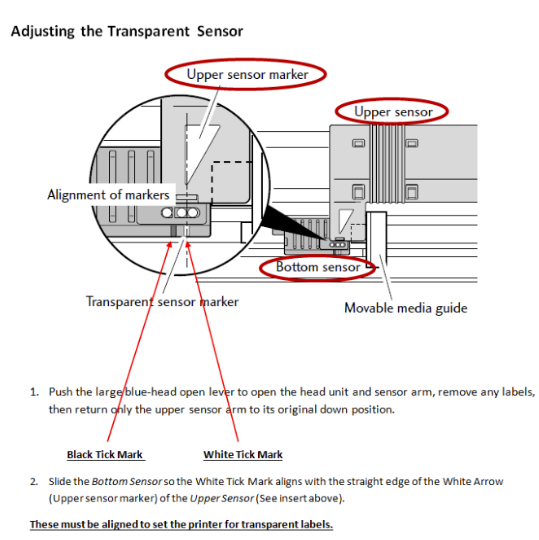
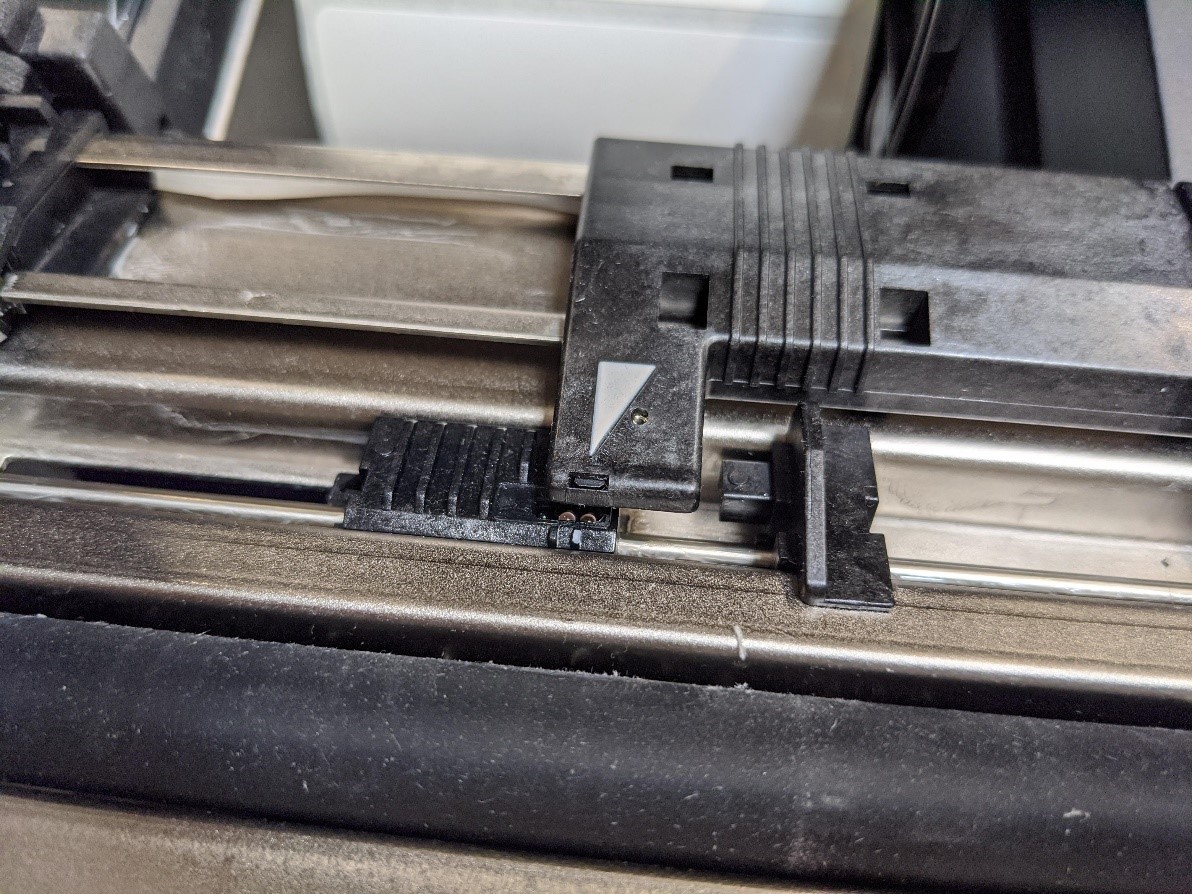
When you receive your RTA barcode printer, the first step is to adjust the transparent sensor. Follow the steps below.
Note: If you experience printer alignment issues or printer errors, you can also follow these steps to troubleshoot the issue. The Transparent Sensor can be knocked or bumped off-center, causing errors, but it can be easily readjusted.
Step 2: Install the Labels
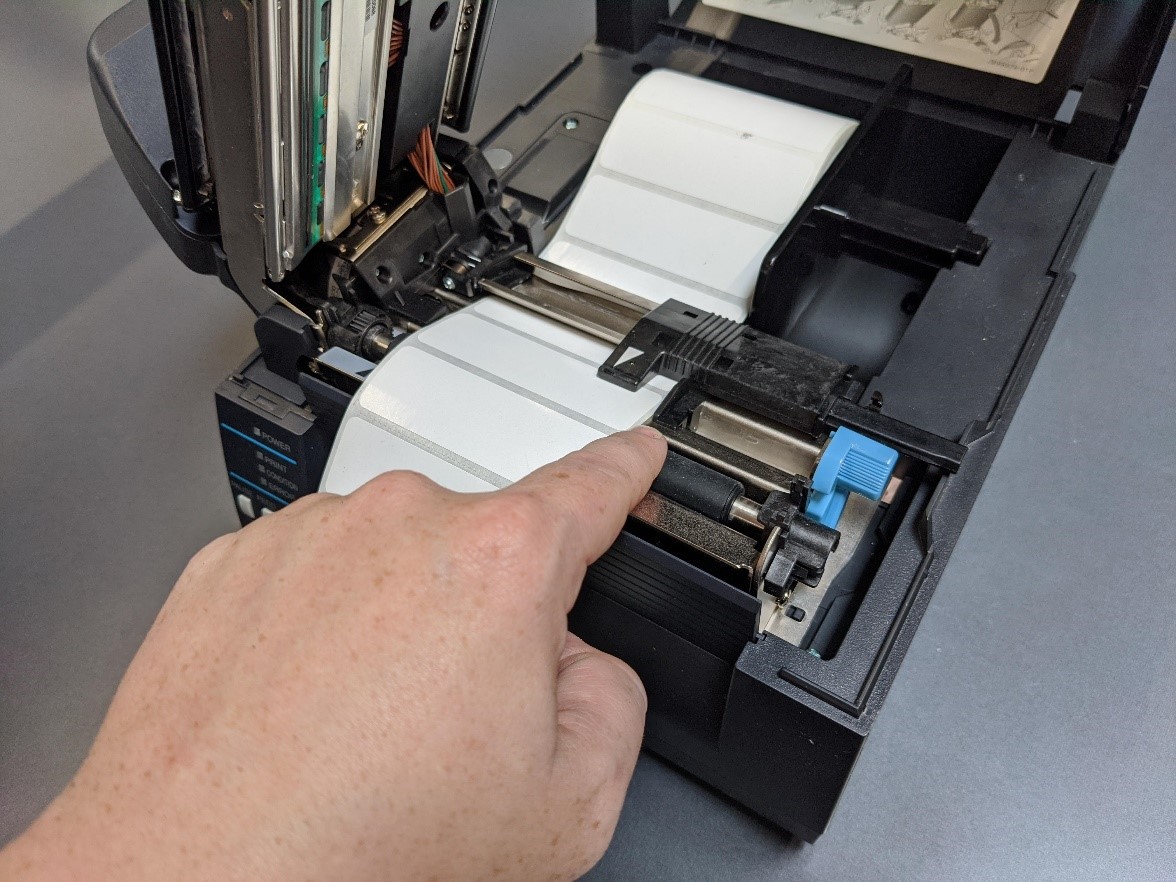
To install the labels, first place them on the holder and set them within the provided field in your printer. Lift the Upper Sensor Bar and place the labels running beneath it.

Next, adjust the movable Media Guide to keep labels aligned while printing, then drop the Upper Senser Bar to hold the labels in place. You should hear a faint click when it’s set properly.
Step 3: Install Ink Ribbon
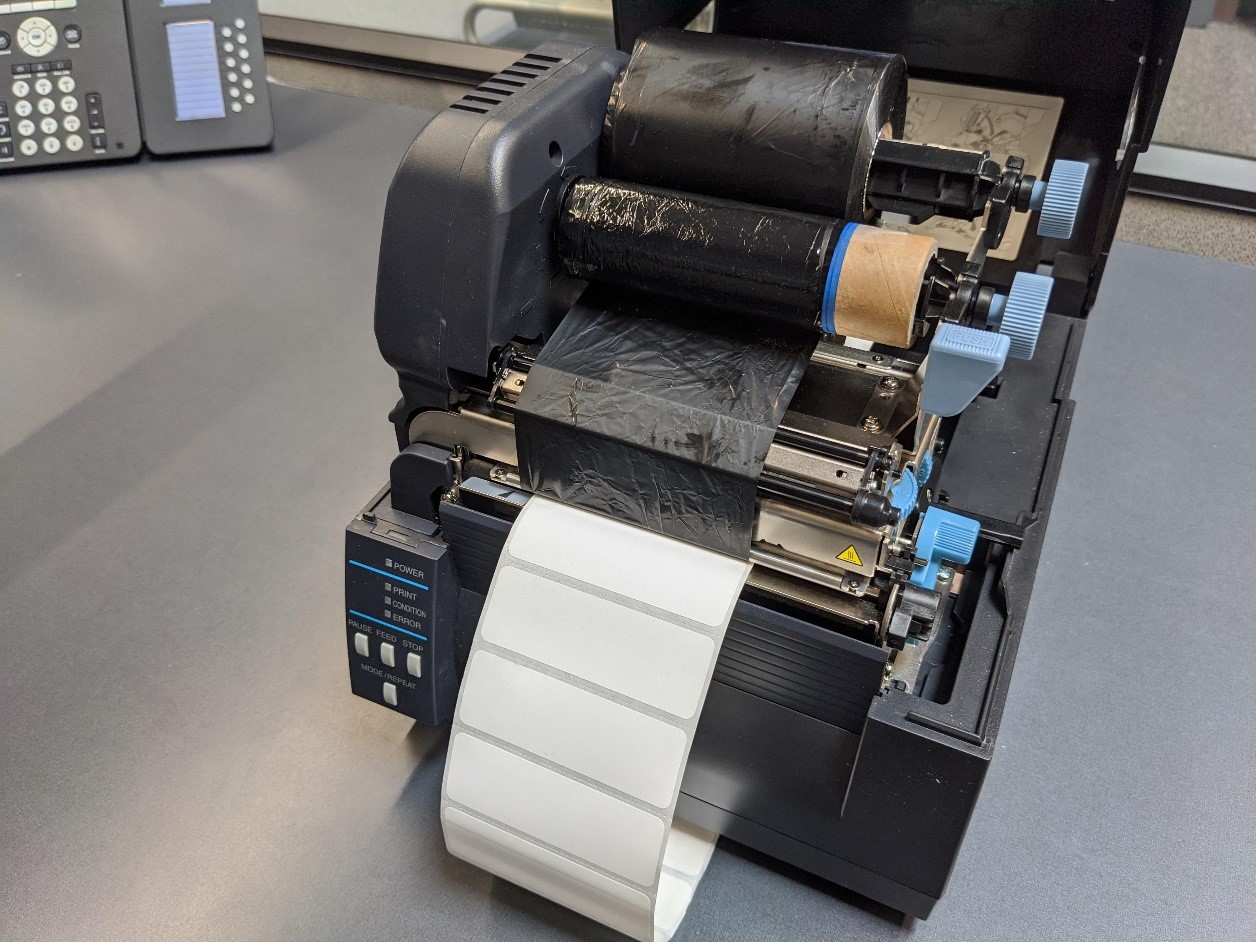
The next step is to install the ink ribbon. Complete this by following these steps:
- To install the ink ribbon, slide the empty cardboard roll all the way to the end of one of the ribbon spools.
- Then, slide the ribbon roll onto the other spool. Note how the ribbon is coming off the roll in relation to how it will slide on the spool. The dull side should be coming down on the labels.
- Next, slip the ribbon and collection spool onto the printer head gears with the full ribbon in the rear. Pull the ink ribbon around (with the dull side facing where the labels will be) and begin rolling it on the empty cardboard roll.

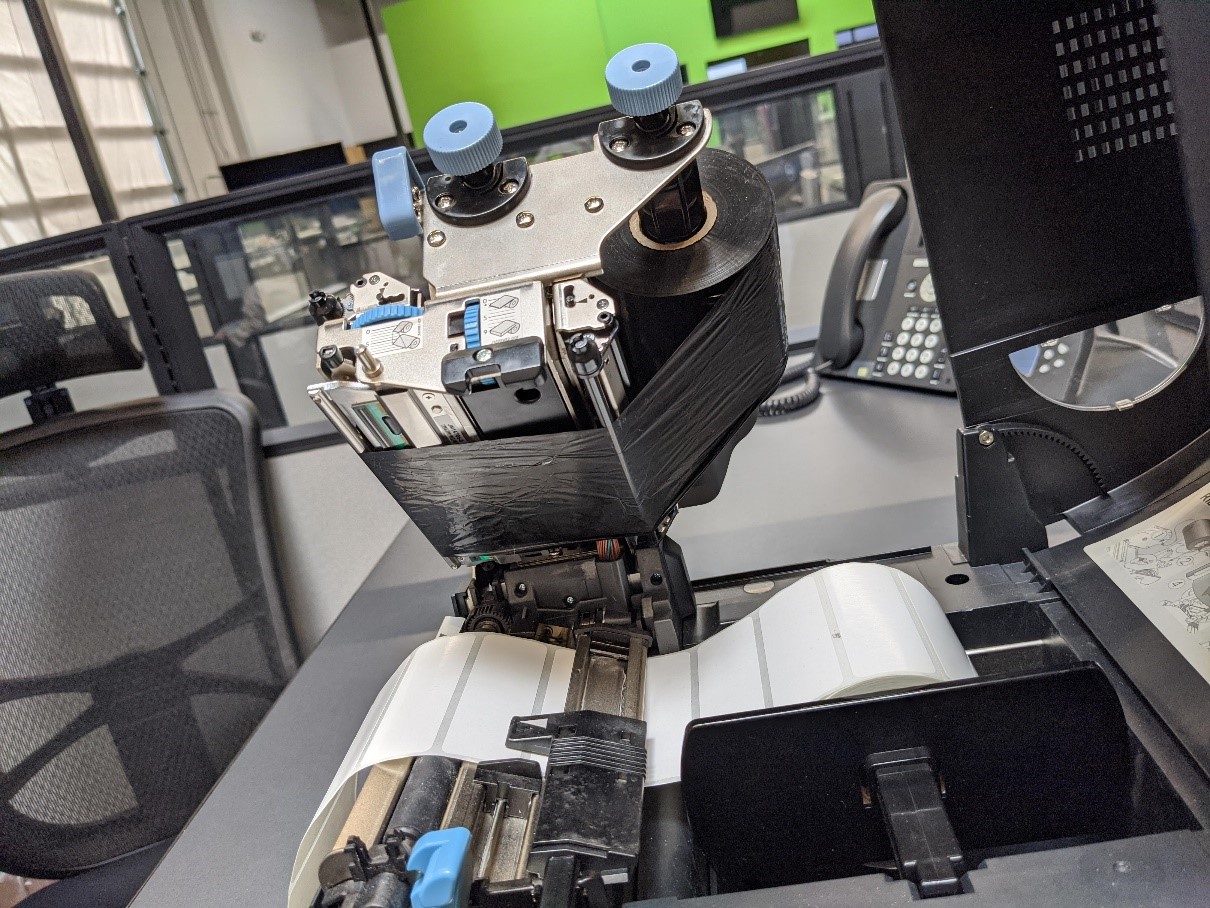
- Lower the printer head back into place. Close the printer head.
Step 4: RTA Setup
To get your printer set up in the RTA software, follow these steps:
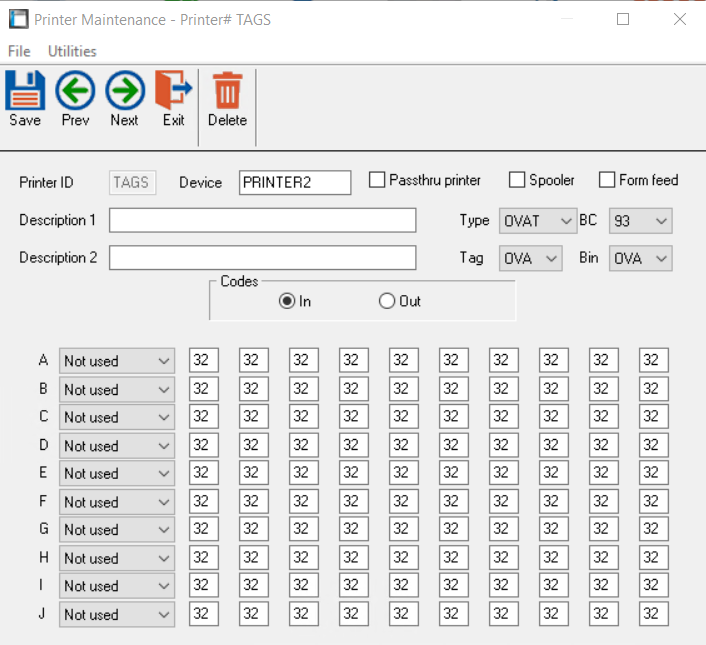
- From within RTA, open the Setup Printer options with System > Setup Printers > File Maintenance (a Level 3 password will be required).
- Select your Printer Device (it should be PRINTER2).
- The Settings should be as follows:
- Passthru Printer, Spooler and Ford Feed should be Unchecked
- Type should be set as OVAT
- Tag can be OVA or OV4 (OV4 is a larger print, but will cut off the bottom line)
- For BC, it is recommended to use 93, as it shows a compressed code. 3of9 can also be used, but certain characters may not be recognized by RTA scanners (such as a “/” or ‘”” in the part number)
- Set the Codes to “In”
-

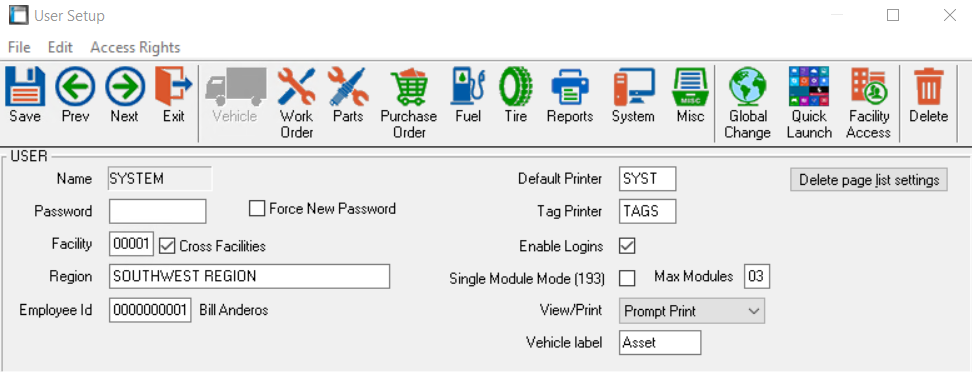
- Open the RTA User that will be printing from System > Setup Users > File Maintenance (Level 3 password required) > Select User > Set the Tag Printer to “TAGS”.
For additional information on Printer settings setup within RTA, please see our knowledge base at https://docs.rtafleet.com/rta-manual/barcode-it/setup-steps/.
If you have additional questions, please reach out to our Support team.

